Notice to all visitors and members of the Train-Sim.Com message forums: If you plan on using a signature banner in your posts, we would like to remind you that there is a maximum size for banners. That maximum is 450 pixels wide by 120 pixels high, and not to exceed 25k. Your compliance is appreciated. FORUM RULES Problems? There are two common reasons for problems with logging in and posting messages. The first is that you are running a firewall that prevents your messages from being sent to the server. The other is that you have cookies disabled; the DCForum software requires cookies to work properly.
Okay folks, it's me again. I think I've figured out most of the handy tricks to the RE, and I feel pretty comfortable laying track. I'm also working with Gmax and in two evenings have produced this 20-meter section of elevated for the MBTA's Green Line near Lechmere. But I'm having trouble placing it in the route:Yes, I realize that the 'el' piece isn't quite wide enough for two pieces of track, but I know how to fix that. What appears to be happening is that the el piece is sort of taking precedence over the track despite being located underneath it. But yet the rails appear above the surface of the el, while the ballast is underneath. In the sim, if I pan the camera downward, the car appears to be running about half a meter above the el, yet the rails look sunk into it and of course the ballast is under it. I wonder if it's some setting within the .sd file?Also, I noticed that a couple of .sd files had lines saying Snapable ( ) and I'm wondering if that would allow you to snap the pieces together like track? It sure would make laying the el pieces a lot easier.Thanks,Alex Stroshane Amtrak Prototype & Model Photos, Train Gifs, and more! http://www.trainweb.org/asamtrak911
First, to make track layed over the top of anything opaque, it has to be set as a terrain object. The only way I know to do that is to select the object (usually a bridge section, and for all practical purposes that's what you got there), then right click on it, and check the box for "terrain object" on in the properties window that pops up. There may be a way to set something as a terrain object by default, I never looked.For the snapable thing, you could try adding that line to the SD file for your object and see if it works, if not the other way is to use the "snap to grid" feature of the RE. I tried the JPredgirder 25 meter section at 25 meters, that was a bit short, so I changed it to 24.7 so there were no gaps. The number defaults to 100 meters, but I change it to 24.7 and the cursor snaps to the next point 24.7 meters away from the previous. After placing as many as I want (and turning each one individually into terrain objects), I turn off snap to grid, and holding down the CTRL key I select each piece in turn. The CTRL select is "multiple select", and will get all the objects you click on. (Don't work for track, signals, or forest regions, alas.) Then you can rotate or move the whole span. It's a good idea to do this on a flat area, then tilt the entire span if you need a grade, and once you get the height you want use the CTRL key again to move it around, since hitting the H key will make each piece conform to the terrain individually, leaving a rather bumpy mess if it ain't perfectly flat underneath. If you have enough RAM you can place 4 or 5 sections with this method, rotate to face the direction you want, then hit CTRL-C to copy the multiple selection to clipboard, and CTRL-V to paste a copy of the 5 sections on the route. You have to position each copy you paste, but it's aligned exactly on the azimuth of the ones you copied from, and if the terrain object setting is already on the ones you copy from each set you paste will already have it too.
Thanks for going to the trouble of making that detailed explanation. I actually was just fooling around in RE literally half an hour ago, and stumbled upon the "terrain object" setting by accident. That fixed the basic problem, and now all I have to do is (a) widen my el structure to properly accommodate double-track, and (b) position the track at the exact height to match the deck of the el. I added some sections to it in its current state and while it still looks odd from being too narrow, it looks at lot better with the cars going over it.Thanks also for suggesting the 'snap to grid' feature. I saw that but didn't realize you could set up your own grid settings. Maybe I'll try that later to quickly string together the necessary number of these pieces.Alex Stroshane Amtrak Prototype & Model Photos, Train Gifs, and more! http://www.trainweb.org/asamtrak911
Another infamous note: I recommend you hold off getting my Guide (if you are contemplating buying it), because a new version is ready to be sent to the publisher. It has nearly 400 pages now (compared to 200 for the first edition and 260 for the first major update), and includes a tool called Object Rotator to help the advanced RE user accurately orient objects: this should be helpful for long strings of bridges and platforms.I will announce availability and pricing when known.Michael Vone Step by Step Guide to Route Building for MSTS - http://trainsimulatorworld.com/catalog/b470.htm Albula Line Route Rocky Islands Route Cliff Hanger Route http://avsim.com/hangar/utils/mvchallenges/

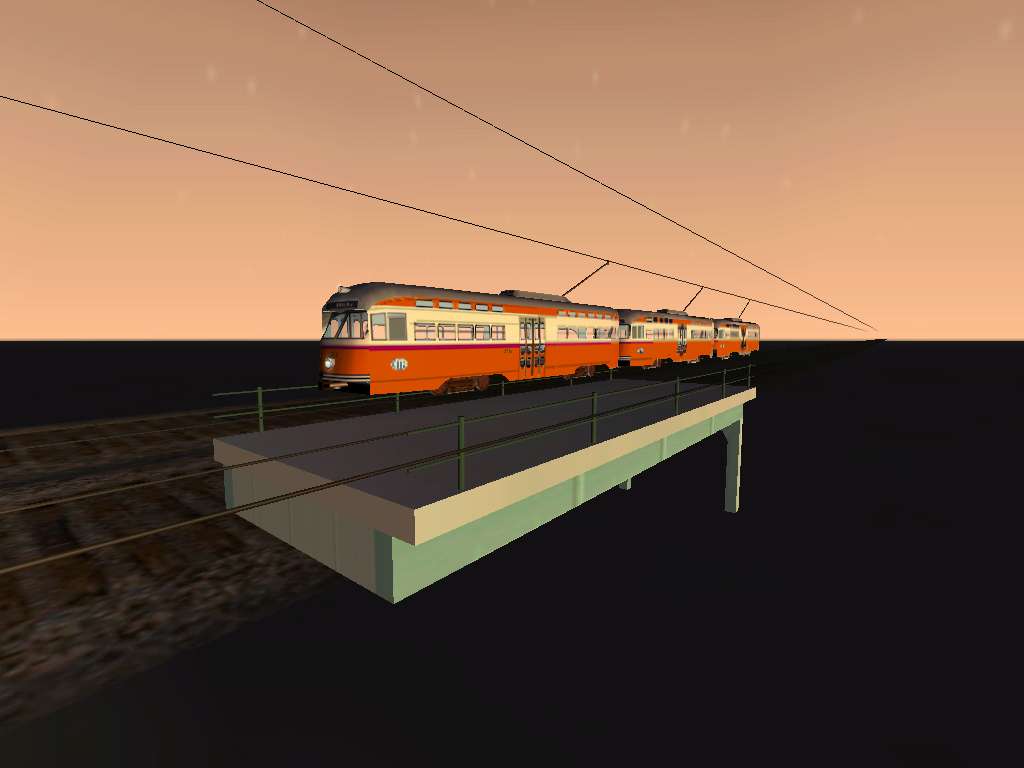 Yes, I realize that the 'el' piece isn't quite wide enough for two pieces of track, but I know how to fix that. What appears to be happening is that the el piece is sort of taking precedence over the track despite being located underneath it. But yet the rails appear above the surface of the el, while the ballast is underneath. In the sim, if I pan the camera downward, the car appears to be running about half a meter above the el, yet the rails look sunk into it and of course the ballast is under it. I wonder if it's some setting within the .sd file?Also, I noticed that a couple of .sd files had lines saying Snapable ( ) and I'm wondering if that would allow you to snap the pieces together like track? It sure would make laying the el pieces a lot easier.Thanks,Alex Stroshane
