

LAST EDITED ON Jan-25-03 AT 12:39 PM (EST)
Today's lesson: Learn how to post pix! This in depth, Illustrated How-to will have you posting like a pro in no time!But First, The guideline
1. resize image to 800x600
2. compress it to under 100K .jpg (or it won't show anyway)Some Pointers:
IrfanView can be downloaded at the following site
www.IrfanView.com , BTW did I mention It's freeware!John Roth was kind enough to expose the secrets of fine screen shooting, please see his post at.
http://www.train-sim.com/dcforum/DCForumID15/80.html#1Judd Spittler Also has a fine guide on making good screen shots, see his at
http://juddspittler.com/spittler_engineering/taking_good_screenshots.htmRemember, The driving aids and stuff don't look good when trying to capture the right shot, so turn those off, When your going for photo-realistic screen shots
Now the How-To1. Your playing train sim Or Trainz, and you see this screen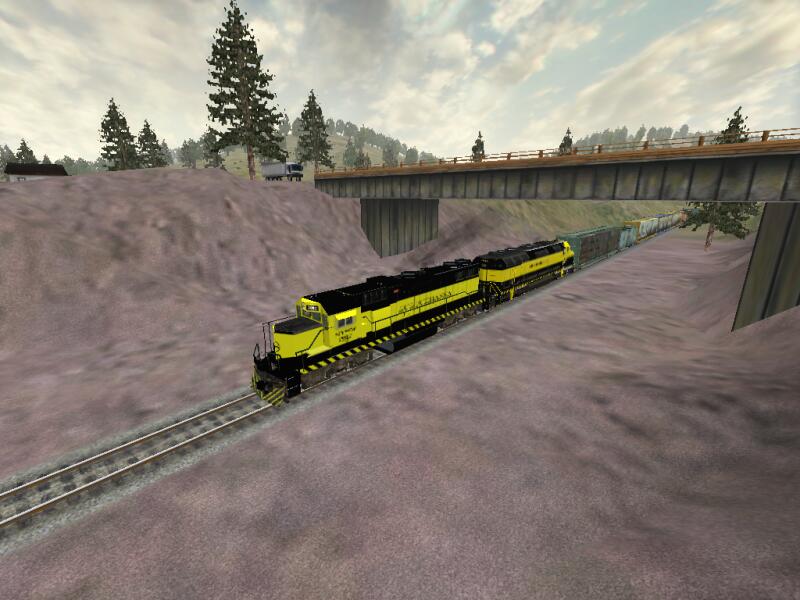
and you wanna share that image with others, But how???2. It all starts with this key!
Yep, that's the print screen key, when you play MSTS, and see something you like, give this key a press.. And I'll show you the rest!3. Ok, we got a screen shot now, but we have to prepare it, to show it, Let's start off by going to IrfanView. 4. IrfanView Loaded? Good, Now lets Click the open command.
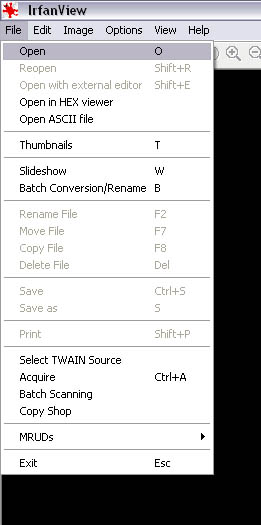 5. That will take us to a menu that looks like this. Browse to your train sim Or Trainz folder, Your file structure will look different from mine.For Train sim:
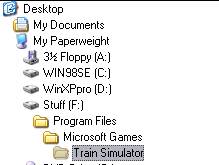 For Trainz:
 6. Ok Looking in the train sim folder we see this, Or If you browsed to your Trainz folder, you'll see .Tga files
In Trainz, The files are named Screen_999.tga, where 999 is a number from 001 to ?
Different from MSTS, Trainz adds screenshots in several sessions and doesn't overwrite older ones. For people following the Trainz aspect of this tutorial, The rest it all the same for both Simulators, after This step. The .pcx (MSTS) or .Tga (Trainz) file is your screen shot, double click it to load it into IrfanView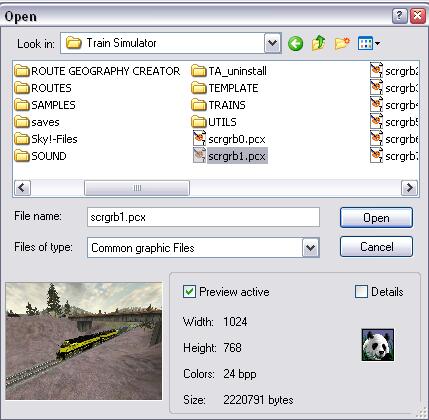 7. Ok, Now with the image loaded into IrfanView, the fun begins, Let goto the resize/resample command.
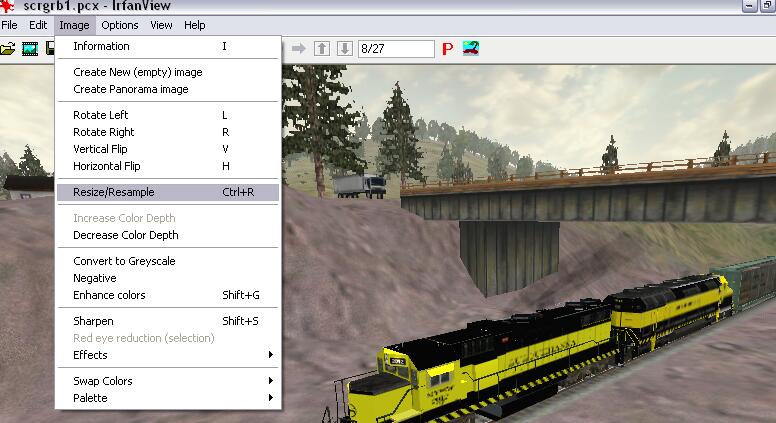 8. Eh? Now what? Let's click on the 800x600 optionl, then click OK
 9. Were makin' tracks, Now we have to save the image, Pick a folder to put the image in, so you remember where you put it when you upload it, Click the Save As command.
 10. We should now be at a window that looks like this. This is where we will compress the image, I find that putting the slider on about 75% makes a file small enough to be uploaded while leaving a fairly clean image, You can experiment and see if you can set it higher, But for the sake of this How-To we'll use 75%. Now click OK
 11. That's it for the IrfanView Part, Now we'll upload the pix to the train-sim.com Screen Shot forum, you start by making a normal msg. See the link that says "Click here to choose your file" click that.
 12. A pop-up window should appear that looks like this, Click the Jpeg option, and then click browse.
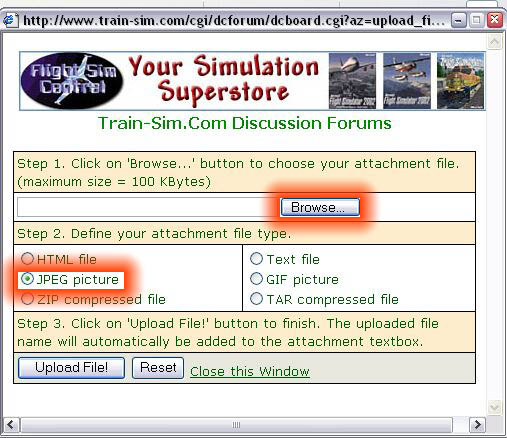 13. Now we have to locate the saved .jpg we made, Browse to the folder containing the image and double click it.
 14. Ok, now we're ready to upload!, click the Upload File! button
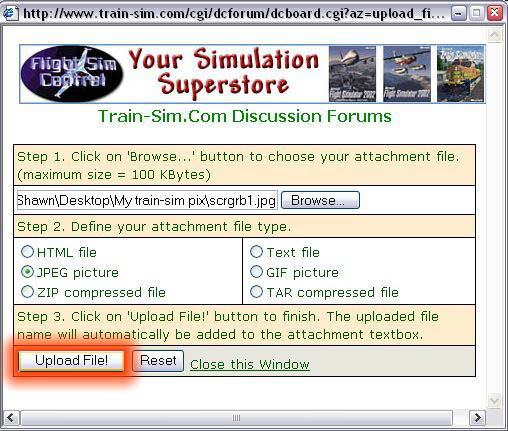 If all went well, You should see this msg. *If you want to post multi images in a post, repeat starting from step 12, If not close the pop-up window.
 15. Post the msg! *note that the attachment box has some stuff in it, Leave it like that, It's normal.
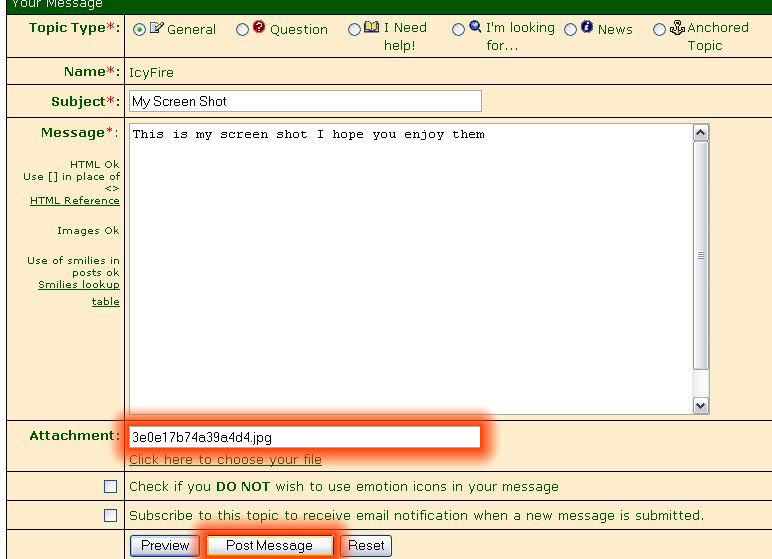 16. If everything went according to plan, You'll have a msg that looks like this. If It does, Congrats! you posted a pic, give you self a pat on the back!
 If this don't work, try it again, If still no luck, Drop me a e-mail, I'll help ya out.And A special Thanks to Dick van den Hoven who helped me write the Trainz section.

Shawn "Icy-Fire" Kenselaar ShawnSSK@Yahoo.com
Printer-friendly page | Top
[ Home | MSTS Forum | MSTS FAQ | File Library ] Copyright © 2002 by Nels Anderson. All Rights Reserved.