LAST EDITED ON Apr-08-04 AT 01:40 PM (EDT)
I know some folks have trouble with texturing, so I thought I'd share a "subtle" trick I use...In this particular case I'm using TSM, but I think the technique will work in any modeling software.
As you can see from the screen shot above I start with the same drawings I build the model from. I just crop off all the dimensions etc...and then blow the thing up to 1024x1024 (512x512 will also work, but I don't like the way it looks). Using the drawing allows me an crude early preview of the final product.
I start with the side view. This drawing of the Burlington Silver King is from an ancient Railroad Model Craftsman...The "King" is a second generation Zephyr. You can see how they've done away with the articulation and used the more conventional two trucks per car.
I then use the selection tool and crop the drawing to the piece I need. In this case the side of the car up to the nose...The nose is a seperate part.
The cropped side is ready to become a "texture" Now I need to make it 1024x1024. I do this in two steps...The first is to resize the image so the "longest" dimension is 1024 pixels...

The length of the image becomes 1024...The height must be allowed to set itself, in this case 244 pixels. Make sure you set "maintain aspect ratio" to on!
Now that the image is set to 1024 in one direction, we need to expand it the other way. Even though I'm only actually using 244 pixels "heightwise", The texture must be square in order to work with the modeling software...To do this I resize the "canvas" of the image to a 1024x1024 square

I set the new width and height and make sure that I don't center the image. Most times I leave 5 pixels at the top (or side). This helps set up the image for the actual "texturing", leaving a little margin to fool around with.
The image is ready to be used as a texture!A short insert here about organizing your work in TSM (or any program). TSM is loaded on my machine in a folder called C:\Program Files\Abacus\TS Modeler...
This folder has sub-folders (or "sub-directories" if you're an old DOS user like me). I use this file structure to organize my work. My models, for example are stored in "Projects" in a folder specifically created for each project...In this case "EMC EA". All the 3-D model parts are stored in that folder.
I do the same with my backdrops and my textures. So the texture we just created gets saved to C:\Program Files\Abacus\TS Modeler\Textures\EMC EA as Side.bmp. I may seem over organized but when you've got more than a few models going at once it really helps.
Back in TSM...You can see that I've already fooled about with the front. It's not perfect, but I can adjust the texture to fit. More on that later.
To apply the side texture I make sure the body of the "King" is selected as the current part. I then hit F4 (or the menu item Part/Texture)...The "wonderful" TSM texture assignment tool loads. I start with the right side...

by choosing the section of the texture I want with my mouse. You can also key in coordinates, but I have never tried it. The mouse is so easy...And Yes, this isn't the same image saved in the last step. I created a second side by selecting, copying and pasting the first. I then mirrored it. Don't forget to mirror all the lettering! You may have noticed I missed the words "Silver King".
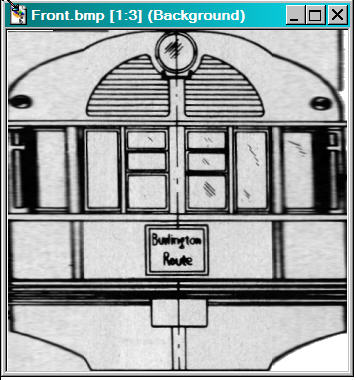
The right side of the car is textured!The front is done much the same way. Because of it's shape, however, we have to massage the image to fit the model, I do this on a trial and error basis by stretching parts of the bitmap, and then checking the fit in TSM...First I load the bitmap for the front...
Hmmm...Needs to be centered for what I'm planning to do. That's easy enough. I just select the part I want, cut and paste as a new layer. Presto...sort of centered!
Now I can stretch the picture. I used the select tool to grab the section of front by the right-most window.
I then use the Deformation tool to stretch that side

Then I go back to TSM and try it out...
Needs a bit on the other side...I go back and stretch the left side and return to TSM. While it may not be perfect, it does give a good indication on how the bitmap needs to be altered to make the final texture. Since I've used up a ton of server space with all these screen shots, I'll quit for now. Hopefully you get the idea...Here's a screen shot of a Milwaukee Road "A" class textured though this process...I used colored drawings from Model Railroader as a start. Of course I had to do a lot of massaging and repainting, but it sure went a long way to guiding me to the results I wanted.
 I have found there is one major drawback to this technique...I tend to leave the models this way and run them in MSTS for a while. It's a little like having paper mockups of trains, except they actually work!Frank Musick
Moving America into the 19th Century!
www.kelticsylk.com
Printer-friendly page | Edit | Reply | Reply With Quote | Top
RE: Texturing trick..., CMO, Apr-08-04, 02:59 PM, (1) RE: Texturing trick..., dadio2k, Apr-08-04, 10:42 PM, (2) RE: Texturing trick..., KeltikSylk, Apr-09-04, 09:25 AM, (4) RE: Texturing trick..., dadio2k, Apr-09-04, 01:37 PM, (6) RE: Texturing trick..., heffed, Apr-09-04, 05:19 AM, (3) RE: Texturing trick..., KeltikSylk, Apr-09-04, 09:42 AM, (5)
Conferences | Topics | Previous Topic | Next Topic
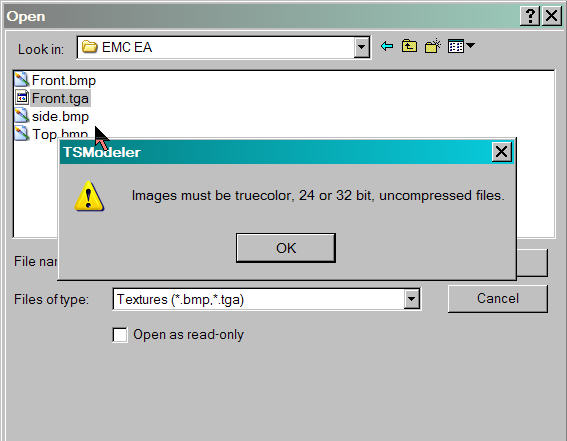 I do remember a time when early on with TSM where I would try to use a TGA image and it would not "appear" in the perspective window. I started using bitmaps exclusively and have had no problems...There are some real considerations to using 1024x1024 bitmaps. TSM will not automatically convert them to ACE files. I think it tries something else (512x512?).. To use them in MSTS you have to apply the textures and them manually convert them using "TGA Tool" (I think it's available in the library) There's a "switch" for 1024x1024 bitmaps (for cabviews). Setting this to on lets you create the large textures as ACE files. Then you have to manually move the ACE files into whatever Trainset folder your model is in.There might be an easier way, but I haven't learned it yet.Of course, the extra detail can cost you in file size so you absolutely have to use compression. The other consideration is the larger textures may affect frame rate for those with less powerful computers among us. It doesn't seem to be a major issue, I haven't seen complaints.FrankMoving America into the 19th Century!
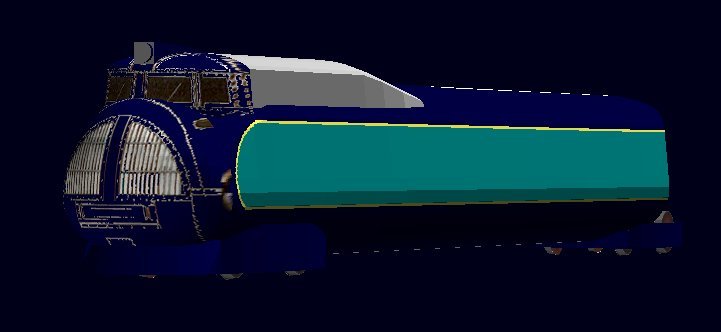 Didn't use the "Onion Specific" colors, don't want to pay royalties...Anyway...I can see this getting out of hand. Paper cutouts for trees, buildings, people. A kind of "Paddington Bear" look for an entire route!
 FrankMoving America into the 19th Century!